Wednesday, March 27, 2013

Funky Chair Makeover

I feel like I haven't had any good upholstery projects in a while.  I don't know why but I kind of love doing them.  It keeps my hands busy and I feel so accomplished when I finish it.  I haven't shared this one before, but it is one of my favorite upholstery projects I've done so far.

I found this floral chair at the Salvation Army forever ago.  The fabric had definitely seen better days, but the shape of it was really cute and petite.

This was maybe my second or third project so I was a little nervous.  But I just followed my tried and true method; it's very complex and complicated.  Put everything back the way you took it off.  I know mind blowing.

I actually did alter this one a little, I chose to tuft the back in a smaller pattern and it originally had a skirt that I left off.


I don't have a 100% completed pic of it, I added pink piping to the bottom as well.  I love the way it turned out.  Perfect for two little girls!


Linked to Whipperberry


Tuesday, March 26, 2013

Printing Pictures on Canvas

I have five hundred and fifty one million projects planned and not yet started.  They all require working out in the garage and it is still freezing.  At the end of March.  In MISSISSIPPI! 
My warm weather loving self just can't handle it.  So I've been scrounging around for projects I can do in the house. 

I showed you the gallery wall in our hallway a while ago.  I loved it, but I wanted a miniature painting for it.  I searched for one on Etsy and found a few I liked, but I wasn't one hundred percent.  It' so hard to tell online what you're really getting.

Then I found a blog post saying you could print on a canvas.  I was walking around Hobby Lobby a few days later and found these miniature canvases on clearance for 3 bucks!

It was so easy to make my own art. You will need:
canvas
tissue paper
printer paper
mod podge
foam/paint brush

I printed off the picture first so I could center the tissue paper.  Then I taped a piece of tissue paper to a piece of regular printer paper


And then ran it through the printer.  I didn't have to do any resizing for mine, because the mini canvas was about the size of a regular photo. 

Remove the tissue paper from the regular paper and lay it over your canvas.  Then cover with a thin layer of mod podge.


Try to dab on the mod podge rather than applying it in strokes.  Using a lot of strokes will cause the ink to run.  After this step it doesn't look great, but just set it aside and let it dry.  The mod podge adheres it to the canvas and as it dries you will see the texture of the canvas. 

Once it dries, you are ready to hang your art.

 I'm so glad I didn't buy a painting now.  The photo is more personal and has meaning.  It is from a sister's weekend Erin and I went on last year.  We went to Hot Spring and stopped by a garden on our way out.  It was so beautiful and ended up being our favorite part of the trip.  This little picture is a great reminder of our weekend.

And it fits perfectly in the gallery wall!

I can't wait to do this project again!

Thursday, March 21, 2013

This Old House

Check out my bench project on the This Old House website!  Fingers crossed I'll make it into the reader issue.
 
Side view of the bench

Wednesday, March 20, 2013

Bookshelves


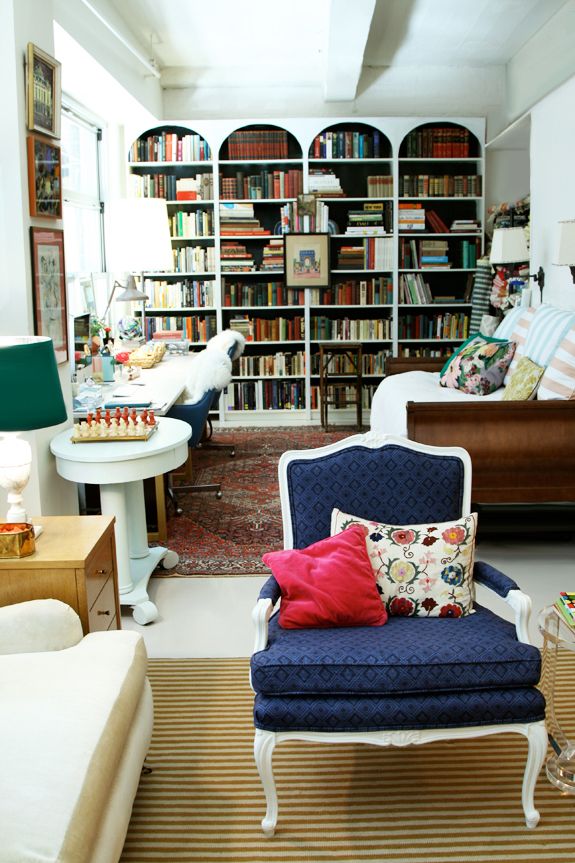
These arched bookshelves have been all over the blogosphers.  Jenny over at Little Green Notebook is a crazy genius and came up with the idea.
 
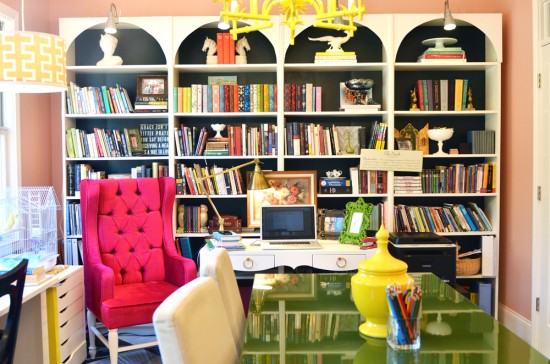
Edie at Life in Grace did a fantastic job on hers as well.  I love all the bright colors!


I really wanted these bookshelves, but I have a shocking confession to make.  I have never stepped foot in an Ikea.  I have never lived remotely close to one and the shipping charges completely negate any savings. 

Since the Ikea shelves were out I decided to try it on a pair of book shelves that I have literally had since I was born.  I have never loved them, but I just can't get rid of them.  They were about three feet shorter than I wanted them and just looked kinda sad over in the corner.  Plus they had no base whatsoever.  No quiero. 

I added a base to mine first since they were so short and to give me space to add trim.  I built a platform and attached it to the base of the bookshelves.
 

 The platform added about 4 1/2 inches.  In hindsight, I would have used either an even 4 or 6 inches so one piece of trim would have covered the gap.  You can still see they are almost 2 ft. shorter than the ceiling even after the platform.


I used cardboard to get an idea of how big I wanted the arch. 
 

I cut out the arches with my skill saw and painted the whole thing.   Ta da!

It's not perfect and definitely no where near as dramatic as the wall of book shelves, but it is one thousand times better.  And since I used supplies we already had this project only cost me about $10 for the crown molding.


Now I just have to finish trimming out the base!


Thursday, March 14, 2013

Weekend Getaway

Every year about this time I am dying for a vacation.  This is our busiest time of year at work and I usually end up working non stop.  (Usually around this time Erin is looking for new room mates!  I miiiiight get a little cranky.)  Last year we took a little weekend trip to Hot Springs.  This year was a girl's trip to Destin.  After a few days of work, I'm wishing I was back here.


Tuesday, March 5, 2013

Water Closet Style


The bathroom in Erin's room is the one room in the house that has not been touched since we moved in.  It is the sink and vanity is open to her room with a separate room for the toilet and shower.  I have tons of plans for the vanity area, but hadn't really thought about the other room at all.  I was just planning on putting up a coat of paint and calling it a day.  Then I came across these pictures.


Who knew these little spaces could be so cute!?  I need to step up my game plan.  I really love this pallet wall, but I have to figure out a way to make it work since the shower is in there.  I'm a little worried about it holding moisture.  Have you seen any cute water closets lately?
 

Monday, March 4, 2013

Wood Sculpture

I took a little blog hiatus last week, cakes and work have put home projects on the back shelf for a while.  I squeezed in a few mini projects last week.  My dad found this really cool piece of wood and brought it to us.  We had it sitting out in the flower bed for a while, but it didn't look quite right.  So I set it in concrete and brought it inside.


Now it's kind of a natural sculpture by the front door.
 
And we finally got around to painting the hallway.  I've hated it since day 1, but we never got around to painting it again.  I like it so much better now!